Building Custom Talos Linux Images for Raspberry Pi with Talos Builder
In the last post, I glossed over one detail that deserved more than a paragraph: building my own Talos images for the CM5. I mentioned talos-builder, dropped a GitHub link, and moved on. This post is me coming back to actually explain what that thing does and why it exists.
If you haven't read the cluster post yet, the short version is: the Talos Image Factory doesn't support the Raspberry Pi CM5 yet — no NVMe boot, no CM5 platform. If you want Talos running on CM5 hardware, you're building the images yourself. That's where talos-builder came from.
The Wall I Hit With CM5
I didn't start out wanting to build custom images. I started out trying to use what Talos already provides, and hitting walls until I had no choice.
My first attempt was Talos 1.12.4 — the most recent release at the time. I tried it with both the standard Talos kernel patches and the upstream Raspberry Pi 6.18y kernel. Every combination ended the same way: the network would drop off periodically, the node would become completely unresponsive, and the only way to recover was a hard poweroff. On hardware you're trying to run production workloads on, that's not something you can work around. It's just a hard no.
After enough of those dead ends, I stepped back and tried Talos 1.11.6. That was the turning point. Stable network, reliable boots, nodes that stayed up. From there, I had something I could build on — so I built a pipeline around it.
What talos-builder Actually Does
talos-builder is a GitHub repository that wraps Talos's official metal image build process with the extra patches and configuration the CM5 needs to actually work. Specifically:
- It builds the kernel from Raspberry Pi's official Linux source instead of the upstream Talos kernel — which is what gets NVMe boot and CM5 hardware working correctly
- It applies CM5-specific patches on top of that
- It bakes system extensions directly into the image at build time — things like iSCSI tools for Longhorn, so every node has them from first boot
- It produces matching images for both CM4 and CM5, so the whole cluster runs the same Talos version with the same configuration
That last point is something I care about a lot. I'm running a mixed cluster — CM5 workhorses alongside CM4 control plane nodes — and consistency across all of them makes everything easier. One image pipeline, one set of upgrade commands, one version to track. When you're managing eight nodes, the last thing you want is to remember which nodes need different treatment.
Supported Hardware
The builder currently produces images for four configurations:
- Raspberry Pi Compute Module 5 on the CM5 IO Board
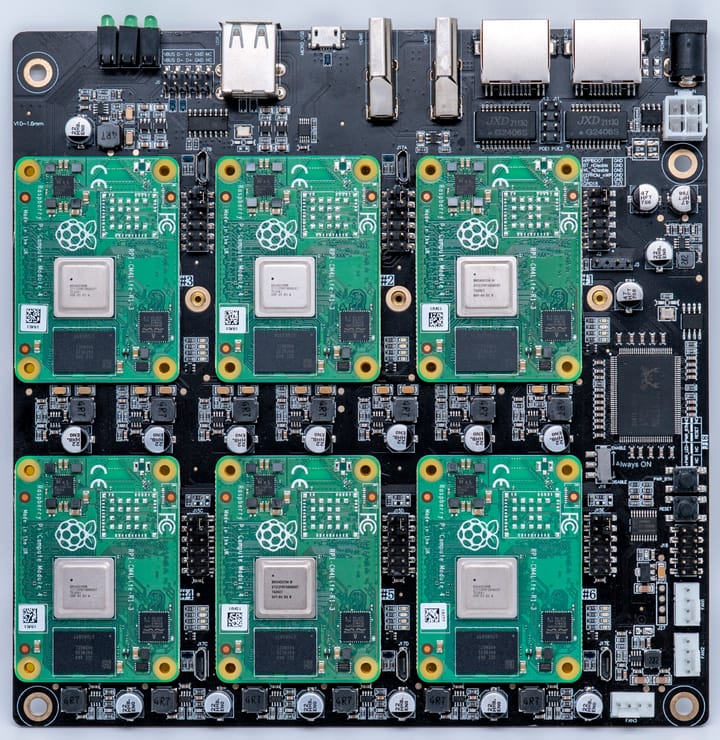
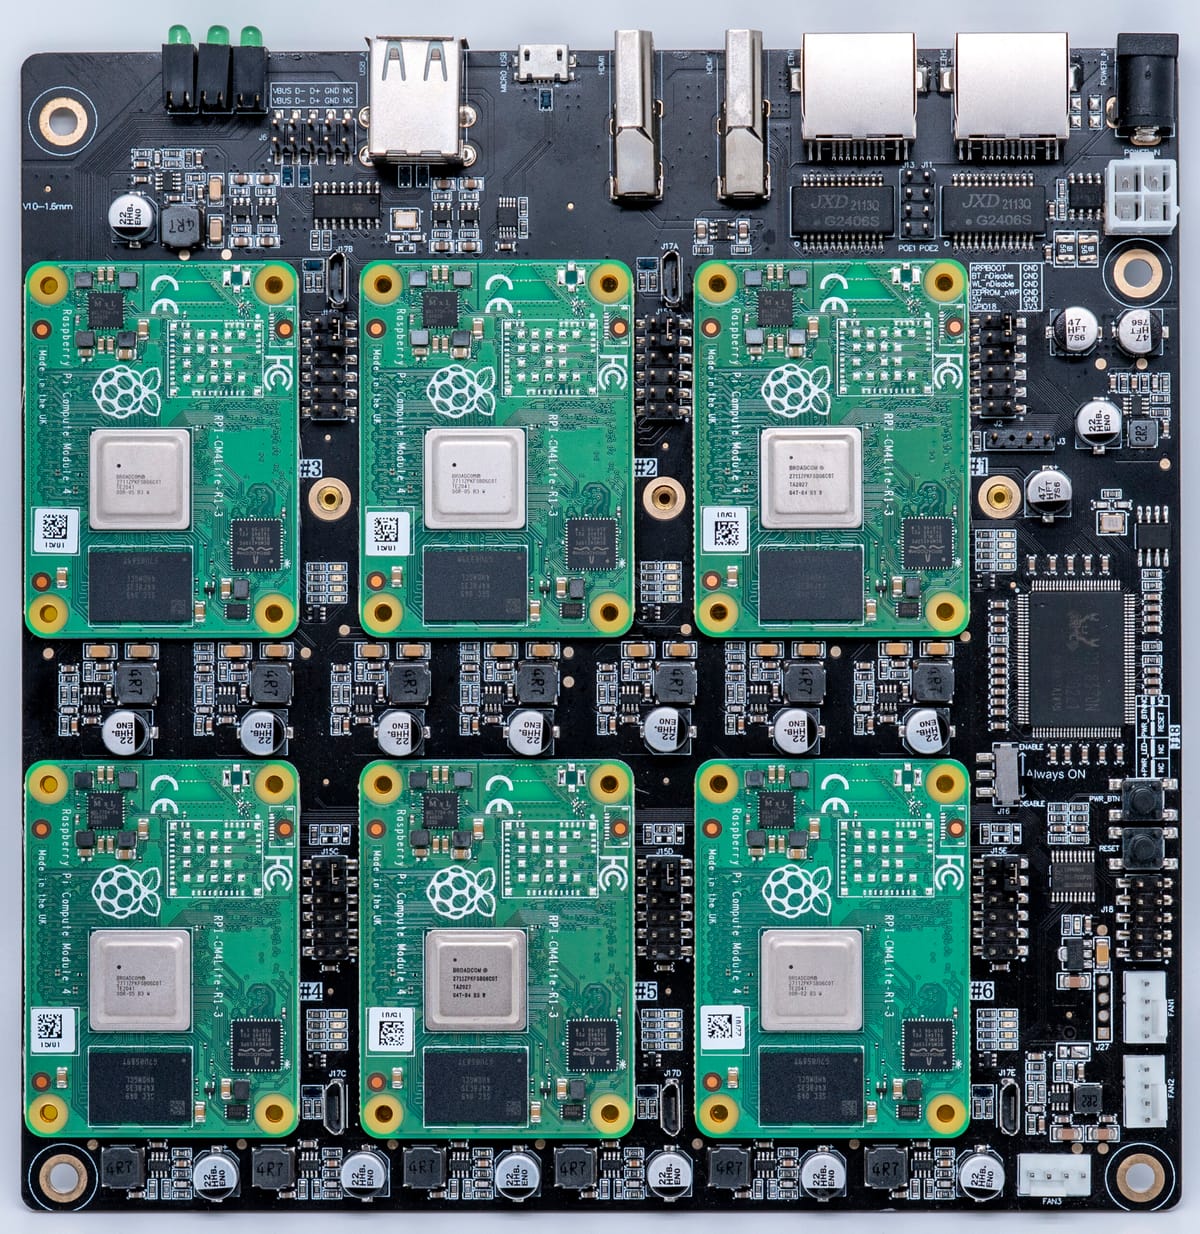
- Compute Module 5 Lite on the DeskPi Super6C — this is what my main cluster runs on
- Raspberry Pi 5b with the RS-P11 expansion board
- Raspberry Pi 4 / CM4 — because consistency across the cluster matters
The DeskPi Super6C variant is the one I actually run in production. Six CM5 Lite slots per board, each with its own M.2 NVMe slot. It's what made NVMe boot viable for the whole cluster in the first place — and once you've run a Pi cluster from NVMe, going back to SD cards isn't something you entertain.
The Build Pipeline
The actual image builds run through GitHub Actions. I'm not building these on my laptop or a local machine — I push a change or tag a release, and the CI pipeline handles the multi-stage build and pushes the resulting images to the GitHub Container Registry under ghcr.io/talos-rpi5/installer with version tags for both RPi5/CM5 and RPi4/CM4 variants.
Keeping the builds in CI was a deliberate choice. It means the images are reproducible, they're built from a clean environment every time, and I'm not maintaining some bespoke build machine that'll eventually diverge from what's in the repo. The pipeline is the source of truth.
Flashing a Node
Once a build completes, flashing a node is straightforward. Grab the compressed raw image, decompress it, write it to the NVMe drive:
# Raspberry Pi 5 / CM5
xz -d metal-arm64-rpi5.raw.xz
dd if=metal-arm64-rpi5.raw of=/dev/sdX bs=4M status=progress

# Raspberry Pi 4 / CM4
xz -d metal-arm64-rpi4.raw.xz
dd if=metal-arm64-rpi4.raw of=/dev/sdX bs=4M status=progress
Once the node boots from NVMe into Talos maintenance mode, my Ansible playbooks take over — generating machine configs, applying them, and bootstrapping the node into the cluster. The whole process from freshly flashed drive to running cluster member is almost entirely hands-off. I wrote about the provisioning workflow in more detail in the cluster post, but the short version is: flash the drive, power the node on, let the automation do the rest.
Upgrading Nodes
When a new image version is built, upgrading a node is a single command:
# Upgrade a Raspberry Pi 5 / CM5 node
talosctl upgrade \
  --nodes <node-ip> \
  --image ghcr.io/talos-rpi5/installer:<version>-rpi5

# Upgrade a Raspberry Pi 4 / CM4 node
talosctl upgrade \
  --nodes <node-ip> \
  --image ghcr.io/talos-rpi5/installer:<version>-rpi4
Talos handles the upgrade atomically — it pulls the new image, writes it to the inactive partition, and reboots into it. If something goes sideways, you can roll back. This is honestly one of my favorite things about Talos: upgrades aren't scary. There's no SSH session where something can go wrong mid-flight, no package manager state to worry about, no manual intervention required. It just works, and if it doesn't, you're not stuck.
The Extension System
One of the more useful things the builder does is let you specify system extensions as a build-time variable. Rather than maintaining a separate image for every combination of extensions you might need, you pass them in when you trigger the build:
make REGISTRY=ghcr.io REGISTRY_USERNAME=<username> \
  EXTENSIONS="ghcr.io/siderolabs/iscsi-tools:v0.2.0@sha256:<hash>" \
  installer-pi5
Extensions are pinned to specific digests for reproducibility and layered into the final image during the build — not installed at runtime. That keeps everything consistent with Talos's immutable OS philosophy. The node boots with exactly the software it's supposed to have, full stop.
For my cluster, the extension I always include is iSCSI tools, which Longhorn requires to mount volumes across nodes. Baking it in means every node has it from first boot — no post-install steps, no config drift, no "oh right, I forgot to add that on this one node."
A Workaround with an Expiration Date
I'll be direct about what talos-builder is: it's a workaround for a gap in upstream support. The moment official CM5 support lands in the Talos Image Factory with proper NVMe boot, I'll happily retire this repo and go back to using the standard tooling. That's the goal.
But until then, it's what makes my cluster possible — and it's proven solid. If you're running Talos on Raspberry Pi hardware and hitting walls with the official tooling, especially on CM5, hopefully this gives you a clearer path forward. The build pipeline isn't complicated once you understand the pieces, and the end result is a proper, consistent Talos image that behaves exactly like you'd expect.
Next up: I'll be getting into how Longhorn actually works on top of this setup — distributed block storage across eight NVMe-booting Raspberry Pi nodes is about as fun as it sounds.